總覽Overview 預先安裝Pre-Install 燒錄Flashing 講義Handouts 活動紀錄History
步驟 03 · 當天操作腳本STEP 03 · WORKSHOP DAY SCRIPT

Qualcomm AI Hub ✕ YOLO26:
BYOM 模型從 Float32 到 INT8 的裝置端部署
Qualcomm AI Hub ✕ YOLO26:
BYOM from float32 to int8 On-Device Deployment

在 Windows 11 + WSL2 主機與 EXMP-Q911(Qualcomm QCS9075)裝置上,走一遍完整的 YOLO26 模型部署流程。 Walk through the full YOLO26 model deployment flow on a Windows 11 + WSL2 host with an EXMP-Q911 (Qualcomm QCS9075) target device — just run them in order. No manual command typing is required.

開始前PREREQUISITES

你需要準備什麼What you'll need

項目Item 需求Requirement
Host x86 Windows 11(建議 16 GB 以上記憶體)x86 Windows 11 (16 GB RAM or more recommended)
目標裝置Target device EXMP-Q911(Qualcomm QCS9075),以 USB-C 連接主機EXMP-Q911 (Qualcomm QCS9075), connected to the host via USB-C
顯示器Display Q911 需接上 DP 螢幕,用來觀看 9 路 streampipe demoDP monitor attached to the Q911 (to watch the 9-channel streampipe demo)
Qualcomm AI Hub 個人 API token(aihub.qualcomm.com)Personal API token (aihub.qualcomm.com)
Host 網路internet Step 1–3 一定需要(apt / Docker Hub);Step 4、5.2 僅在選擇「連網」模式時才需要(AI Hub)——預設的「離線」模式不需要Always required for Steps 1–3 (apt / Docker Hub); Step 4 and 5.2 only need it if you pick "Online" mode (AI Hub) — the default "Offline" mode doesn't
Q911 網路internet 僅在 Step 4 選擇「連網」模式且第一次執行時需要(自動下載 streampipe image,約 3 分鐘);「離線」模式完全不需要Only needed on first run if you pick "Online" mode for Step 4 (auto-pulls the streampipe image, ~3 min); the "Offline" mode needs none
套件結構PACKAGE LAYOUT

資料夾裡有什麼What's in the package

Path 內容Contents
scripts/ 逐步工作坊腳本(本頁的主要內容)Step-by-step workshop scripts (the main subject of this page)
github/iQ-Foundry/ iQ-Foundry 原始碼(量化 qc / mAP / 裝置端測試)iQ-Foundry source (quantization qc / mAP / on-device test)
github/iQ-Studio/ iQ-Studio 原始碼(裝置端 streampipe demo)iQ-Studio source (on-device streampipe demo)
export_qai_fp32/ FP32 匯出用的 Dockerfile 與腳本Dockerfile and script for the FP32 export
iqf_save/ 模型(yolo26n.pt)、校正圖片、COCO val2017 資料集、裝置端 venv tarball、預先量化好的 INT8 模型(Step 5.2 離線模式用)Models (yolo26n.pt), calibration images, COCO val2017 dataset, device venv tarball, a pre-quantized INT8 model (used by Step 5.2's offline mode)
iqs_config/ streampipe 9 路 FP32 / INT8 設定檔streampipe 9-ch FP32 / INT8 config files
docker_images/ 離線 Docker image tarballOffline Docker image tarballs
streampipe/ 使用 streampipe 時所需要的資料Data needed when running streampipe
.agent/ 如果自己有 Claude Code 或 Codex,可以照 README_AGENTIC 裡寫的方式試著操作看看If you have Claude Code or Codex, you can try it out following the instructions in README_AGENTIC
README / README_AGENTIC 使用說明Usage instructions
0

Windows 主機設定Windows Host Setup

[WIN-PS]
觀看教學影片Watch tutorial video

以系統管理員開啟 Windows PowerShell(開始 → 搜尋 PowerShell → 右鍵 → 以系統管理員身分執行),切換到套件的 scripts 資料夾: Open Windows PowerShell as Administrator (Start → search for PowerShell → right-click → Run as administrator), then change into the package's scripts folder:

powershell
cd (Get-ChildItem "$env:USERPROFILE" -Directory -Recurse -ErrorAction SilentlyContinue | Where-Object { $_.FullName -like "*hands_on_workshop_package*\scripts" } | Select-Object -First 1 -ExpandProperty FullName)

執行 Windows 端的設定腳本(約需 5–10 分鐘): Run the Windows-side setup script (takes about 5–10 minutes):

powershell
powershell -ExecutionPolicy Bypass -File .\setup-windows-wsl.ps1

此腳本會安裝並設定 WSL2 Ubuntu-22.04、啟用 systemd,並透過 usbipd 把 EXMP-Q911 的 USB 裝置掛進 WSL。過程需要互動: The script installs and configures WSL2 Ubuntu-22.04, enables systemd, and attaches the EXMP-Q911 USB device into WSL via usbipd. The setup is interactive:

  • Windows 詢問是否繼續時,回答 Y 或 Yes。When Windows asks whether to continue, answer Y or Yes.
  • 若是第一次初始化 Ubuntu-22.04,出現提示時請建立 WSL 帳號(設定使用者名稱與密碼)。If Ubuntu-22.04 is being initialized for the first time, create the WSL account when prompted (set a username and password).
完成後會自動開啟一個 WSL Ubuntu 終端機。之後所有步驟都在 WSL 內執行。 When it finishes, a WSL Ubuntu terminal opens automatically. All remaining steps run inside WSL.
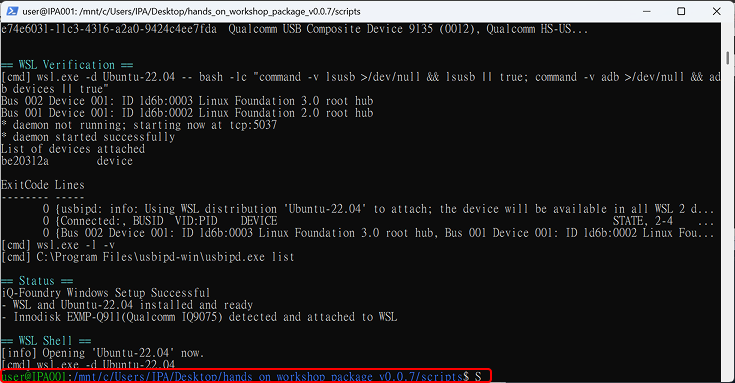
成功畫面Success screen
如果看到藍色和綠色的文字,就代表你已經成功進入 WSL。If blue and green text is displayed, you have successfully entered WSL.
在 WSL 內執行RUN INSIDE WSL

工作坊步驟Workshop Steps

依序執行以下腳本即可(每支腳本都會自動定位套件路徑,並檢查自己的前置條件): Run the scripts in order (each script locates the package path and checks its own preconditions automatically):

1

安裝 adb,確認 Q911 連線Install adb, check Q911 connection

[HOST] · 約 1 分鐘~1 min
觀看教學影片Watch tutorial video

用 apt 安裝 adb;adb devices 應該會列出 EXMP-Q911。 Install adb via apt; adb devices should list EXMP-Q911.

bash
./step_1.sh
adb devices 沒看到 Q911?檢查 USB-C 線是否插好、Step 0 的 usbipd USB passthrough 是否完成;必要時回到 Step 0 重新執行一次 setup-windows-wsl.ps1。 adb devices doesn't list the Q911? Check that the USB-C cable is seated and that the usbipd USB passthrough from Step 0 completed; go back and rerun setup-windows-wsl.ps1 if needed.
成功訊息Success message
[Step 1/4] DONE Directory
[Step 2/4] DONE Package index updated
[Step 3/4] DONE adb installed
[Step 4/4] DONE adb device check finished
All steps completed successfully!
2

安裝 Docker,取得 iQ-Foundry imageInstall Docker, get iQ-Foundry image

[HOST] · 數分鐘a few min
觀看教學影片Watch tutorial video

安裝 Docker Engine,pull innodiskorg/iqf:latest。 Install Docker Engine, pull innodiskorg/iqf:latest.

bash
./step_2.sh
成功訊息Success message
[Step 1/4] DONE Directoryub
[Step 2/4] DONE Docker installed
[Step 3/4] DONE Image loaded
[Step 4/4] DONE Image verified
All steps completed successfully!
3

登入 Qualcomm AI HubLog in to Qualcomm AI Hub

[HOST] · 幾秒seconds
觀看教學影片Watch tutorial video

登入 Qualcomm AI Hub 並驗證 token(需要帶入 API key 參數)。 Log in to Qualcomm AI Hub and verify the token (API key argument required).

Step 4.1、5.2 會用到這個登入;若走離線模式則不需要(但我們還是會帶大家操作這一步)。 Steps 4.1 and 5.2 rely on this login; not needed if you're using offline mode (but we'll still walk through this step together).

bash
./step_3.sh <YOUR_QAI_HUB_API_KEY>
把 <YOUR_QAI_HUB_API_KEY> 換成你自己在 aihub.qualcomm.com 取得的個人 API token。請刪除 < > Replace <YOUR_QAI_HUB_API_KEY> with your own personal API token from aihub.qualcomm.com. Please remove the < > brackets.
成功訊息Success message
[Step 1/3] DONE Directory
[Step 2/3] DONE Login submitted
[Step 3/3] DONE Login verified
All steps completed successfully!
4

推送離線 FP32 bundle,執行 FP32 streampipe 9chPush offline FP32 bundle, run FP32 streampipe 9ch

FP32 匯出,安裝 iQ-Studio 並執行 streampipeFP32 export, install iQ-Studio and run streampipe

[Q911] · 約 3 分 45 秒~3 min 45 sec
觀看教學影片Watch tutorial video

不需要 host 或 Q911 連網:直接使用套件內附、已經匯出好的 FP32 bundle(模型 + streampipe image tarball),推送並安裝到 Q911,啟動 FP32 streampipe 9ch。 No internet needed on the host or the Q911: uses the pre-built FP32 bundle included in the package (model + streampipe image tarball), pushes and installs it on the Q911, and starts FP32 streampipe 9ch.

bash
./step_4_offline.sh
腳本會在 Q911 螢幕顯示即時 9 路推論畫面,完成後按 Ctrl+C 即可,腳本會自動清除裝置上殘留的 streampipe container。 The script shows a live 9-channel inference grid on the Q911's monitor — press Ctrl+C when done; it automatically cleans up any leftover streampipe container on the device.
畫面出現後,就可以 接上相機。 Once the screen appears, you can connect the camera.
成功訊息Success message
[Step 1/4] DONE Directory
[Step 2/4] DONE Bundle pushed to /data/local/tmp/streampipe
[Step 3/4] DONE Bundle verified
[Step 4/4] DONE FP32 streampipe stopped
All steps completed successfully!
[HOST · AI Hub] · 約 1–2 分鐘~1–2 min
觀看教學影片Watch tutorial video

4.1 建置 iqf-aihub image,匯出 YOLO26 FP32 TFLite 模型。 4.1 Build the iqf-aihub image, export YOLO26 FP32 TFLite.

bash
./step_4_1.sh
產出:Output: iqf_save/models/qualcomm_ai_hub_fp32/yolo26_det-tflite-float/yolo26_det.tflite
成功訊息Success message
[Step 1/4] DONE Directory
[Step 2/4] DONE Image built
[Step 3/4] DONE Export finished
[Step 4/4] DONE FP32 model
All steps completed successfully!
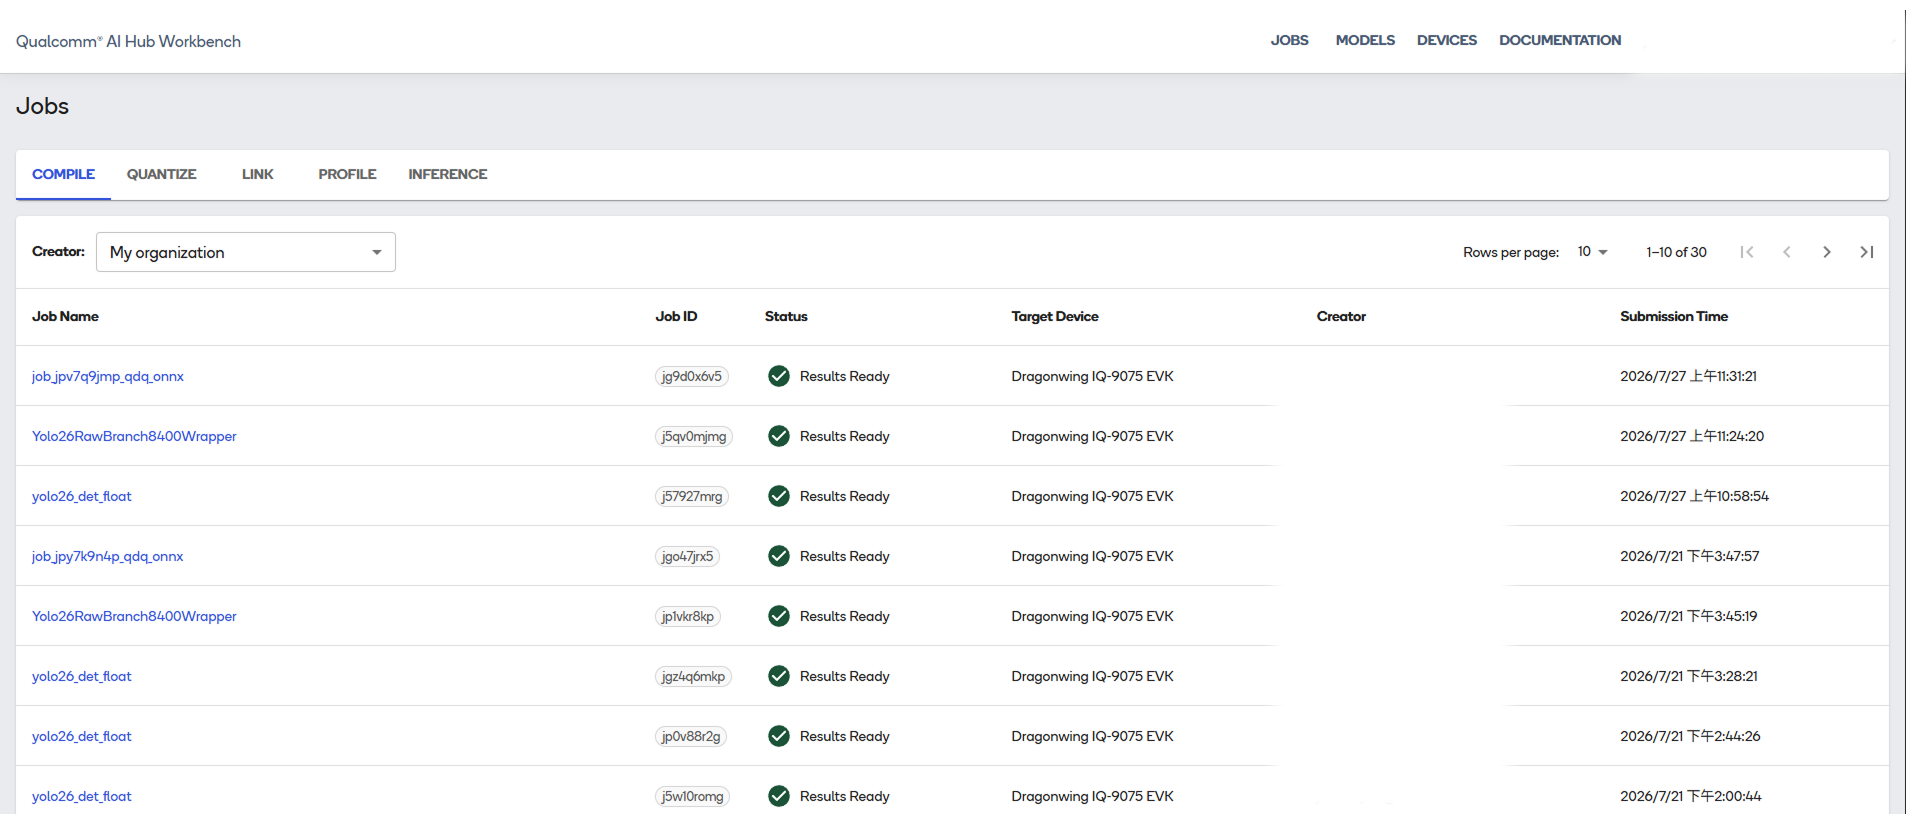
前往 Qualcomm AI Hub 以檢視模型狀況。Visit Qualcomm AI Hub to view model status.
[Q911 · 首次執行first run] · 首次約 3 分鐘~3 min first run
觀看教學影片Watch tutorial video

4.2 把 iQ-Studio 推送並安裝到 Q911,啟動 FP32 streampipe 9ch。 4.2 Push and install iQ-Studio on Q911, start FP32 streampipe 9ch.

bash
./step_4_2.sh
第一次執行需要 Q911 能連上網路(自動下載 streampipe image,約 3 分鐘)。腳本會在 Q911 螢幕顯示即時 9 路推論畫面,完成後按 Ctrl+C 即可,腳本會自動清除裝置上殘留的 streampipe container。 The Q911 needs internet access on first run (auto-pulls the streampipe image, ~3 min). The script shows a live 9-channel inference grid on the Q911's monitor — press Ctrl+C when done; it automatically cleans up any leftover streampipe container on the device.
畫面出現後,就可以接上相機了(現場會提供相機)。 Once the screen appears, you can connect the camera (a camera will be provided on-site).
Q911 沒有網路?切換到上方的「離線」頁籤,改用 Step 4 的離線模式。 No internet on the Q911? Switch to the "Offline" tab above and use Step 4's offline mode instead.
成功訊息Success message
[Step 1/5] DONE Directory
[Step 2/5] DONE iQ-Studio pushed
[Step 3/5] DONE iQ-Studio installed
[Step 4/5] DONE Model and config pushed
[Step 5/5] DONE FP32 streampipe stopped
All steps completed successfully!
5.1

部署 Q911 runtime venvDeploy Q911 runtime venv

離線Offline · 數分鐘A few minutes
觀看教學影片Watch tutorial video

部署裝置端的 venv;執行 adb kill-server,把 USB 讓給 iQ-Foundry container 內的 adb 使用。 Deploy the device-side venv; run adb kill-server to release USB for the container.

bash
./step_5_1.sh
從現在到 Step 5.4,host 端的 adb 會無法使用——這是預期行為,USB 已經讓給 container 內的 adb。Step 5.5 會執行 adb start-server 把它還原。 From here through Step 5.4, host-side adb will be unavailable — this is expected; the USB device has been handed to the adb inside the container. Step 5.5 runs adb start-server to restore it.
成功訊息Success message
[Step 1/4] DONE Directory
[Step 2/4] DONE Tarball pushed
[Step 3/4] DONE venv deployed
[Step 4/4] DONE adb server killed
All steps completed successfully!
5.2

複製預先量化好的 INT8 模型Copy the pre-quantized INT8 model

INT8 量化(qc)INT8 quantization (qc)

[HOST] · 數秒A few seconds
觀看教學影片Watch tutorial video

不需要連上 AI Hub,也不需要下載任何東西:直接把套件內預先量化好的 INT8 模型複製到輸出路徑。 No AI Hub connection or downloads needed: copies the pre-quantized INT8 model already included in the package to the output path.

bash
./step_5_2_offline.sh
產出:Output: github/iQ-Foundry/out/model/yolov26/yolov26_int8.tflite
成功訊息Success message
[Step 1/3] DONE Directory
[Step 2/3] DONE INT8 model placed
[Step 3/3] DONE
All steps completed successfully!
[HOST · AI Hub] · 約 5–9 分鐘~5–9 min
觀看教學影片Watch tutorial video

qc 量化流程:YOLO26 .pt → INT8 .tflite。 qc quantization: YOLO26 .pt → INT8 .tflite.

bash
./step_5_2.sh
產出:Output: github/iQ-Foundry/out/model/yolov26/yolov26_int8_<timestamp>.tflite
成功訊息Success message
[Step 1/3] DONE Directory
[Step 2/3] DONE Quantization finished
[Step 3/3] DONE
5.3

mAP 比較:FP32 vs INT8mAP comparison (FP32 vs INT8)

離線Offline · 數分鐘a few min
觀看教學影片Watch tutorial video

比較 FP32 與 INT8 模型的 mAP(--max-images 50)。 Compare FP32 vs INT8 mAP (--max-images 50).

  1. 執行腳本:執行 ./step_5_3.sh 進行 mAP 評估。 Run the script: Execute ./step_5_3.sh to run the mAP evaluation.
    bash
    ./step_5_3.sh
  2. 查看結果:完成後,可以到 github/iQ-Foundry/out/mAP/yolo26/ 查看結果。 View the results: Once complete, you can view the results at github/iQ-Foundry/out/mAP/yolo26/.
成功訊息Success message
[Step 1/3] DONE Directory
[Step 2/3] DONE
All steps completed successfully!
5.4

iQ-Foundry 裝置端測試iQ-Foundry on-device test

離線Offline · 數十秒tens of seconds
觀看教學影片Watch tutorial video

透過 adb 在 Q911 上執行 INT8 推論。 Run INT8 inference on the Q911 via adb.

  1. 查看輸入圖片:先看一下 iqf_save/test/images/ 裡的圖片。 View input images: Check the images in iqf_save/test/images/.
  2. 執行腳本:執行 ./step_5_4.sh(如下方指令)。 Run the script: Execute ./step_5_4.sh (below).
    bash
    ./step_5_4.sh
  3. 查看輸出圖片:到 github/iQ-Foundry/out/test/yolov26/ 看產生的結果,跟輸入圖片比對。 View output images: Check the generated results in github/iQ-Foundry/out/test/yolov26/ and compare them against the input images.
產出:Output: github/iQ-Foundry/out/test/yolov26/
成功訊息Success message
[Step 1/3] DONE Directory
[Step 2/3] DONE
[Step 3/3] DONE Results
All steps completed successfully!
5.5

推送離線 INT8 bundle,執行 INT8 streampipe 9chPush offline INT8 bundle, run INT8 streampipe 9ch

執行 INT8 streampipe 9chRun INT8 streampipe 9ch

[Q911] · 約 40 秒~40 sec
觀看教學影片Watch tutorial video

不需要連網:直接使用套件內附的離線 INT8 bundle(模型 + streampipe 設定檔),推送到 Q911 並啟動 INT8 streampipe 9ch。 No internet needed: uses the offline INT8 bundle included in the package (model + streampipe config), pushes it to the Q911, and starts INT8 streampipe 9ch.

bash
./step_5_5_offline.sh
同樣會在 Q911 螢幕顯示即時 9 路畫面,完成後按 Ctrl+C。腳本會執行 adb start-server,把 host 端的 adb 恢復。 Again shows a live 9-channel grid on the Q911's monitor — press Ctrl+C when done. The script runs adb start-server to restore host-side adb.
成功訊息Success message
[Step 1/4] DONE Directory
[Step 2/4] DONE Bundle already present on Q911, skip push
[Step 3/4] DONE Bundle verified
[Step 4/4] DONE INT8 streampipe stopped
All steps completed successfully!
[Q911] · 幾秒seconds
觀看教學影片Watch tutorial video

推送 INT8 模型與設定檔,啟動 INT8 streampipe 9ch。 Push the INT8 model and config, start INT8 streampipe 9ch.

bash
./step_5_5.sh
同樣會在 Q911 螢幕顯示即時 9 路畫面,完成後按 Ctrl+C。腳本會執行 adb start-server,把 host 端的 adb 恢復。 Again shows a live 9-channel grid on the Q911's monitor — press Ctrl+C when done. The script runs adb start-server to restore host-side adb.
成功訊息Success message
[Step 1/4] DONE Directory
[Step 2/4] DONE
[Step 3/4] DONE Model and config pushed
[Step 4/4] DONE INT8 streampipe stopped
All steps completed successfully! Workshop pipeline finished.
6

正確關閉 WSLProperly shut down WSL

[WSL] · 幾秒seconds
觀看教學影片Watch tutorial video

Step 5.5 的 INT8 streampipe 跑完、按 Ctrl+C 之後,畫面會停留在 WSL 裡面。離開前,先退出 WSL,再關閉它: After Step 5.5's INT8 streampipe finishes and you press Ctrl+C, you'll be left inside the WSL shell. Before wrapping up, exit WSL and then shut it down:

bash
exit

回到PowerShell後,執行以下指令,若尚未回到 PowerShell,請再輸入 exit直到成功退回。 Once back in Windows PowerShell, run the following command. If you are not back in PowerShell yet, enter exit repeatedly until you successfully exit.

powershell
wsl --shutdown
執行完 wsl --shutdown 後,就可以關閉 PowerShell 視窗了。 Once wsl --shutdown finishes, you can close the PowerShell window.
回燒錄Back to flashing 下一步:講義Next: Handouts